Turning on the lighting box systems
This page lists the steps needed to power up the lighting box systems ready to program a show or experiment with the lighting and sound prior to setting a show. There are a few other steps needed to run a show if an audience is present and these are detailed in the start show or start film pages.
The hardware in each of the steps below has a corresponding numbered label to help identify it. Click lighting steps for a concise printable PDF version of the lighting steps and sound steps for the concise printable PDF version of the sound/film steps.
The instructions below assume each item has previously been turned off individually rather than through a master switch (items 2 and 3). Don't worry if an items is already on - just skip that instruction.
Lights
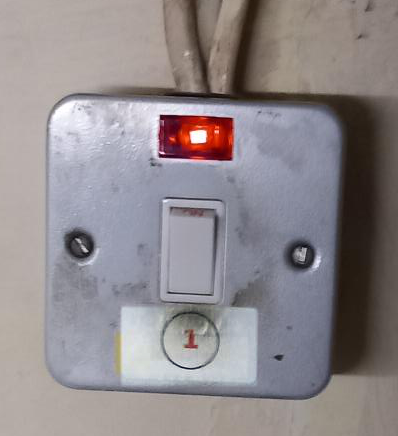 1 As you go up the ladder to the lighting box, switch on the lighting box strip lights with the switch on the wall to your left.
 2. Switch on the 240V that powers the lighting box sockets. This is the cooker style switch at the top left of the central room in the lighting box.
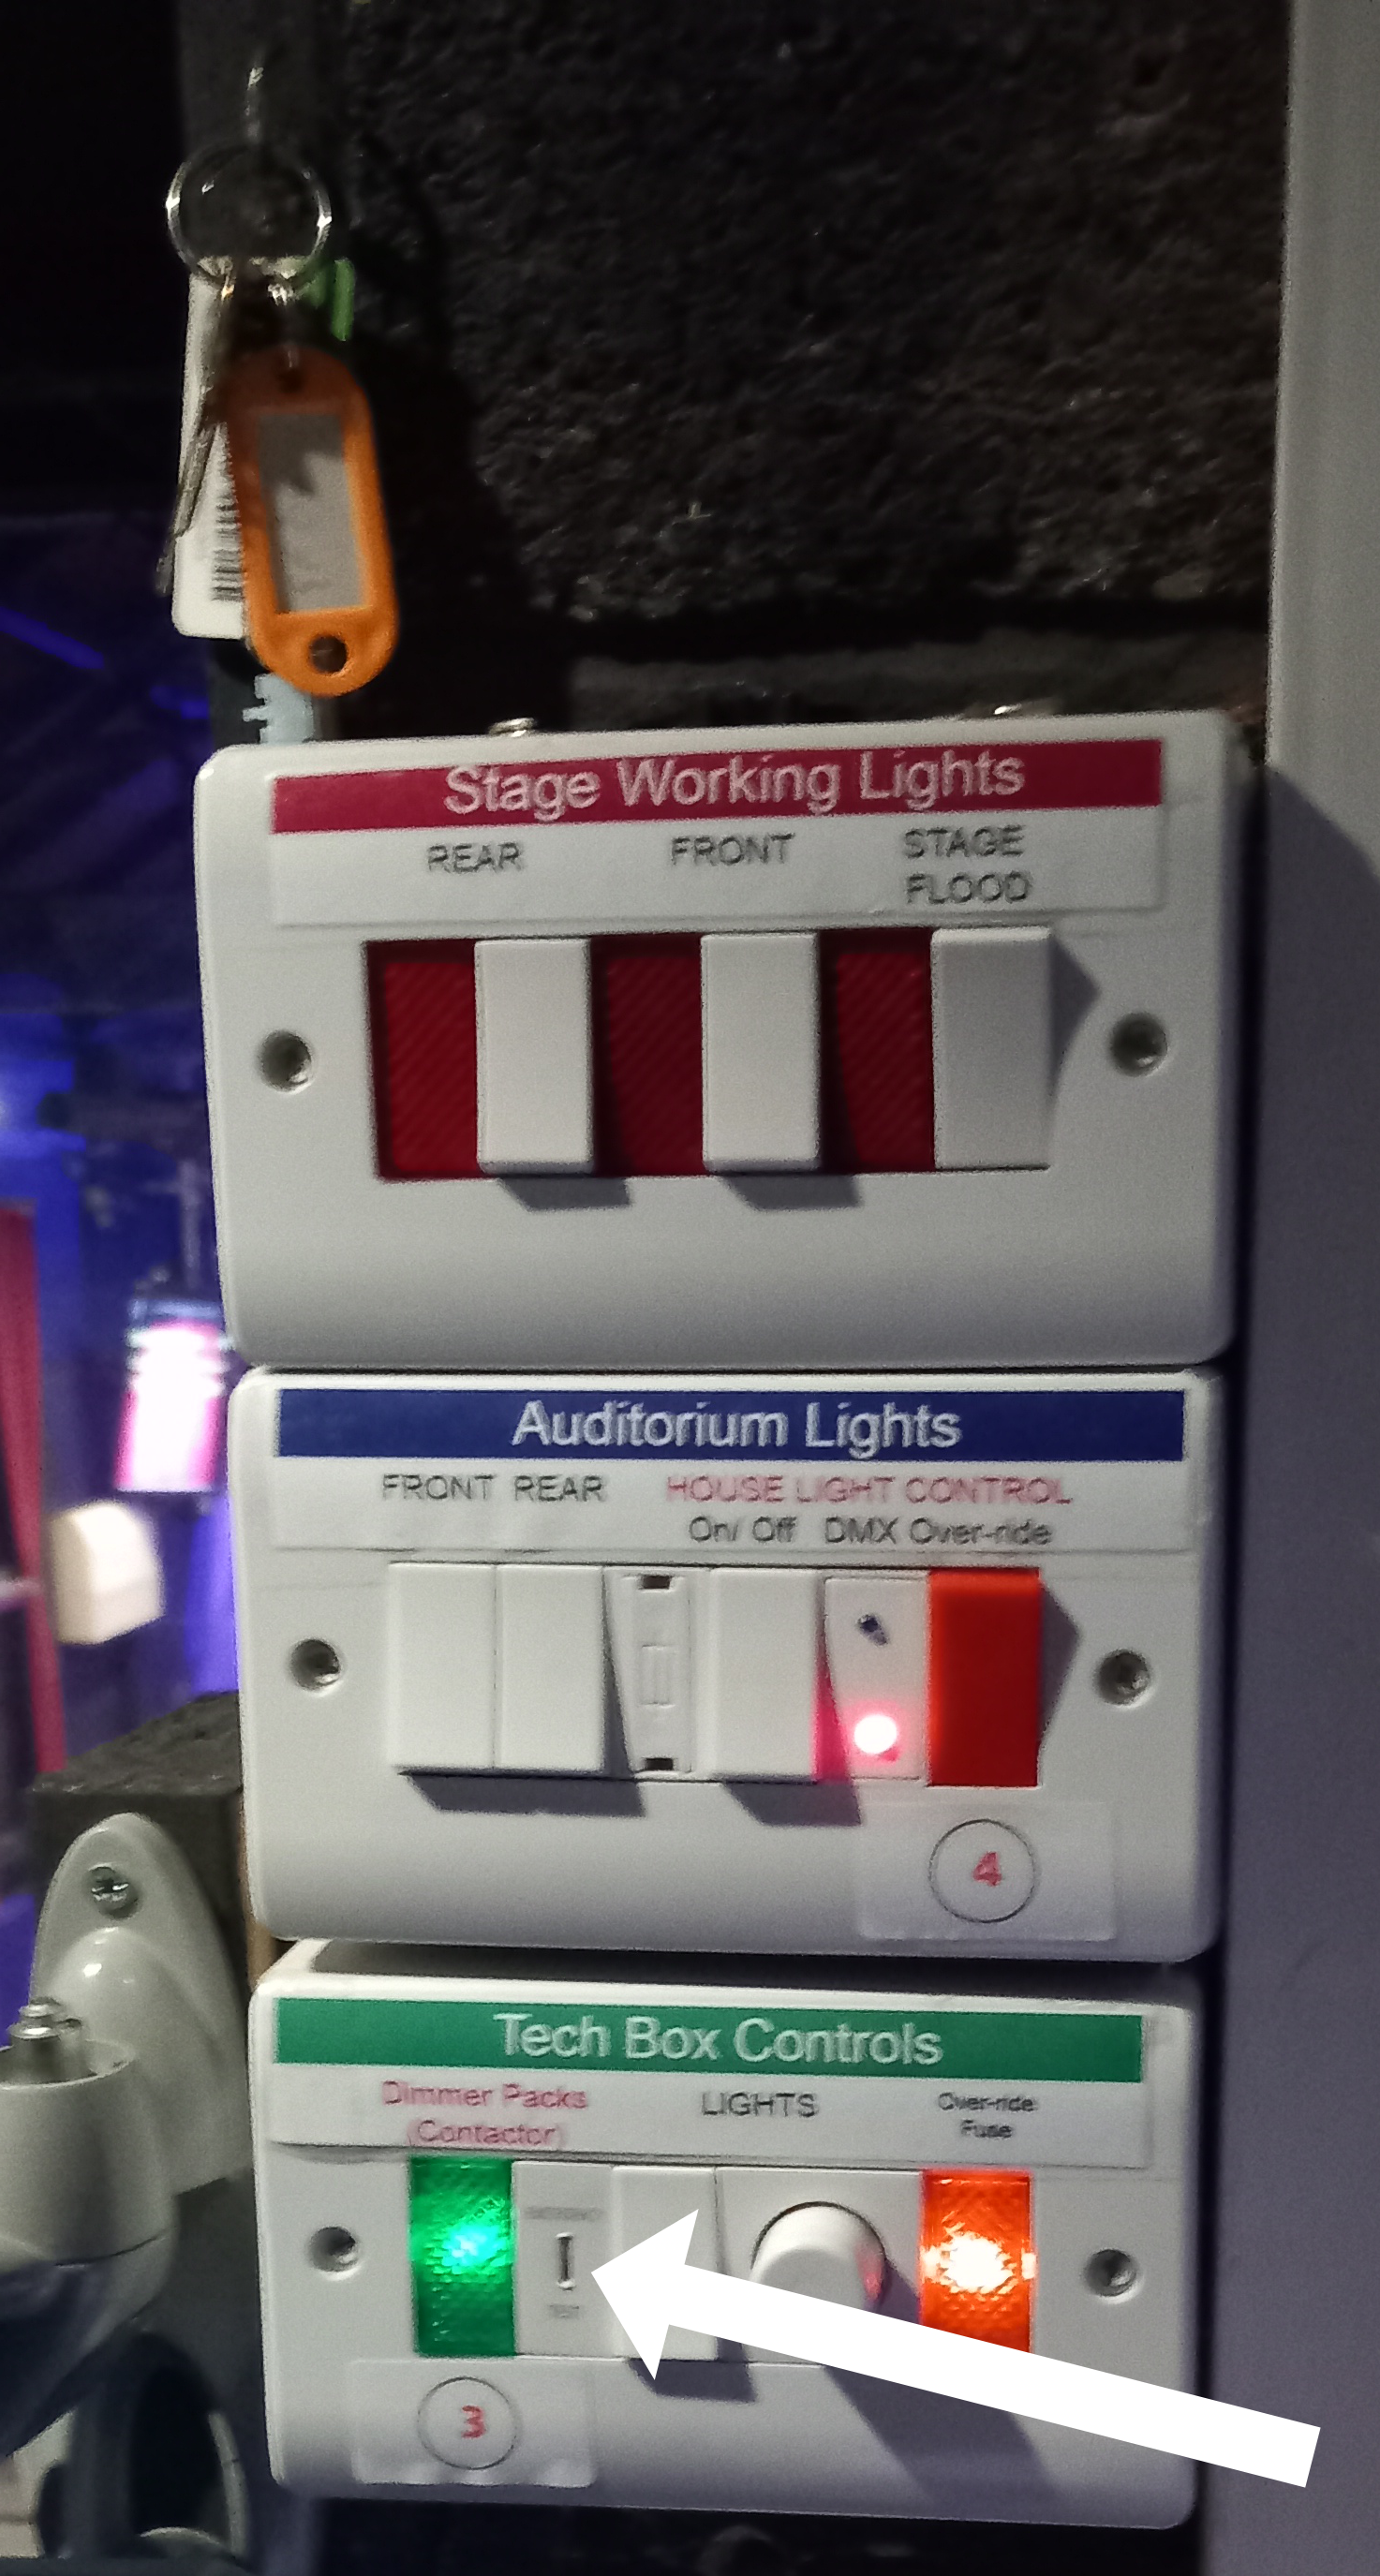 3. Switch on the Dimmer Pack Contactor using the key that hangs on the hook above the block of switches.
The contactor in the switch room downstairs will clunk. It is easy to inadvertently bounce it off again so check that the green light beside the switch stays on.
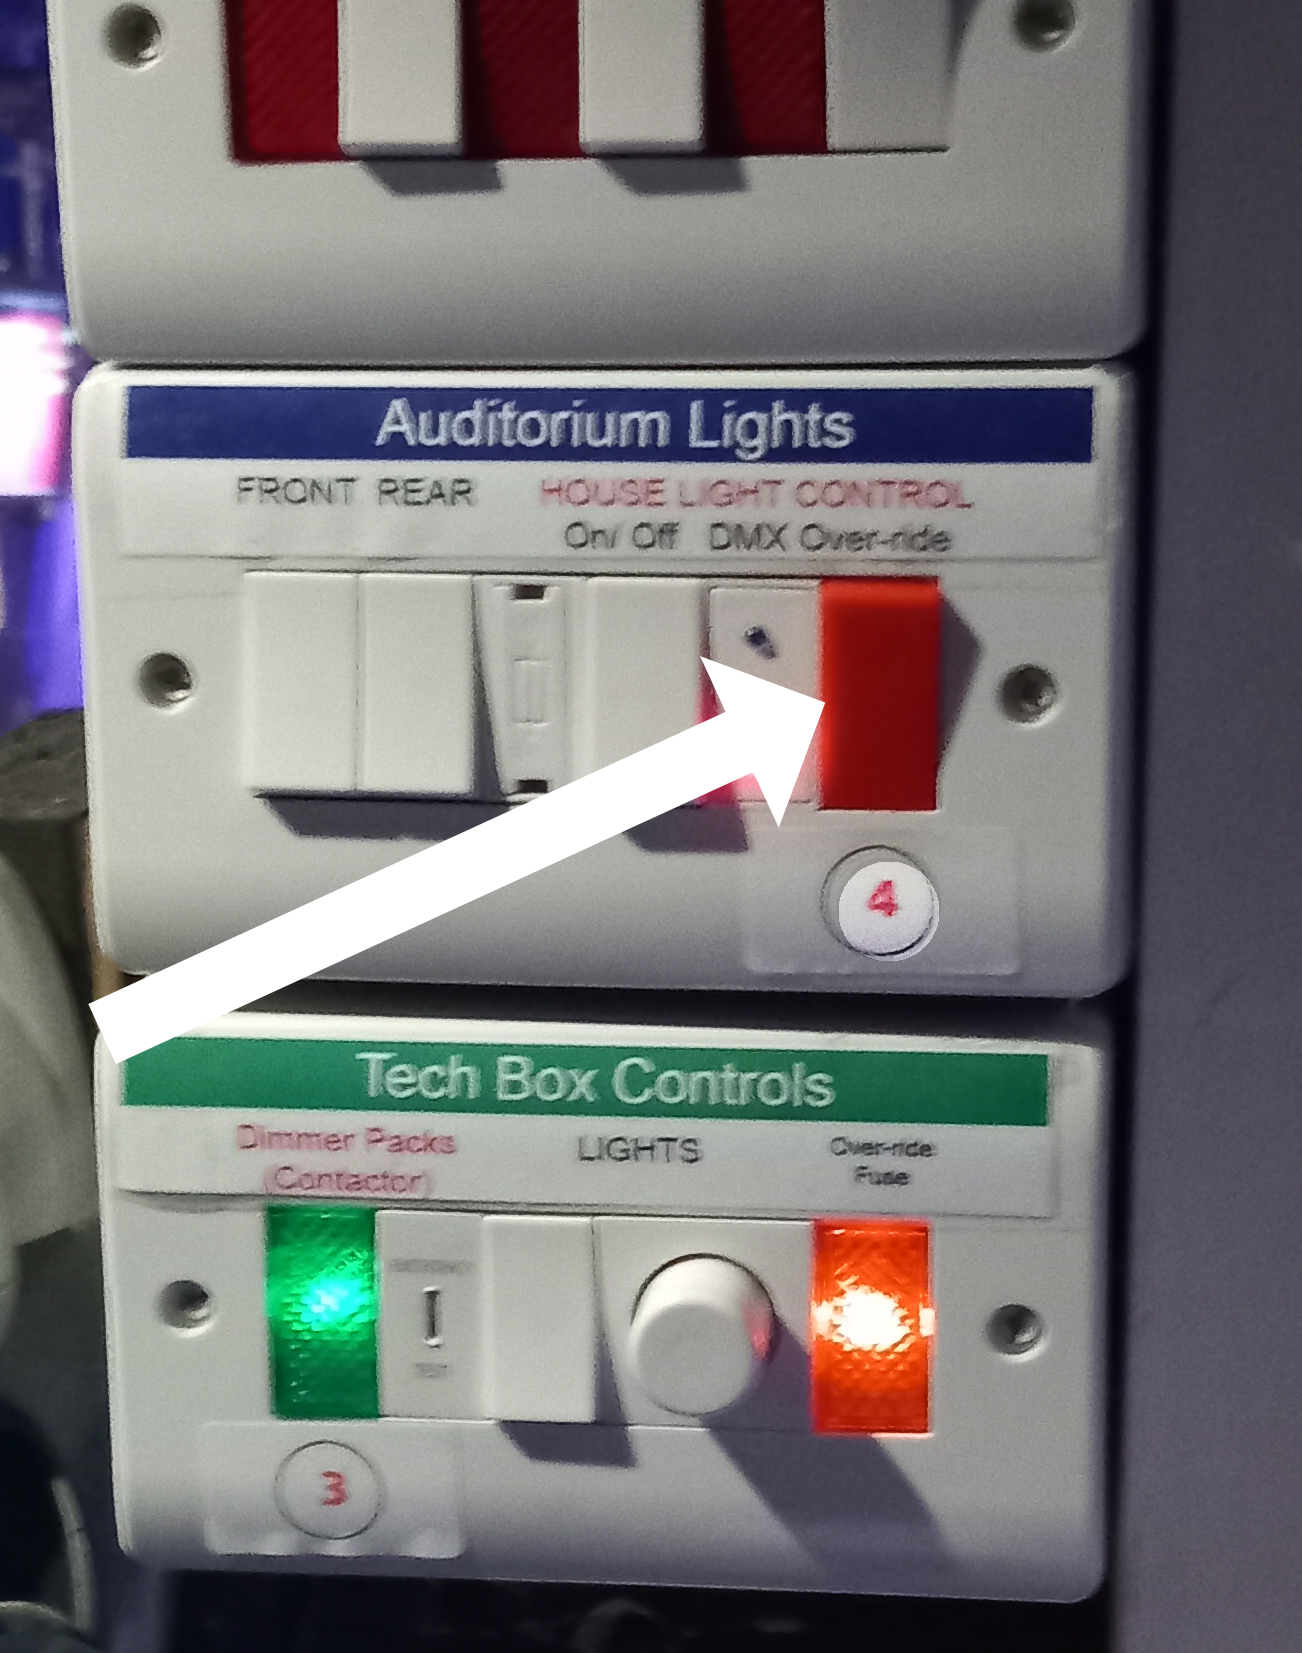 4. Switch over the house light controls. (The red switch). The red light will glow and the house lights can now be controlled in brightness from the lighting computer and the on-off switches in the auditorium won't work.
The switches to the left are changeover switches that operate the halogen lights on the auditorium side walls. Those above operate the stage flood and the fluorescent lights above the stage. Usually you will want to turn off all of these.
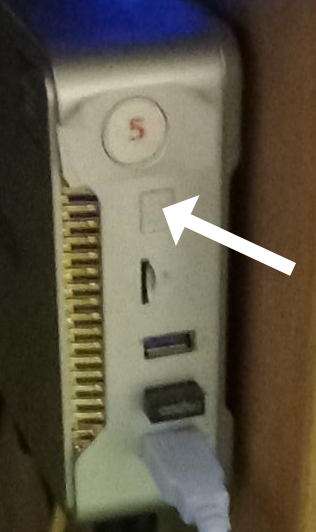 5. Switch on the Mini PC. under the desk on the right hand side. This is the PC for the lighting computer screen
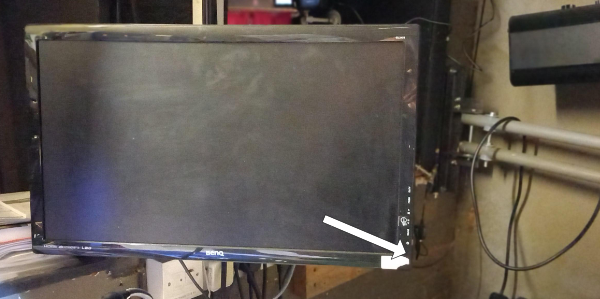 6. Switch on the lighting computer screen. - The large one on the right of the desk.
7. When you see a prompt on screen, enter our pin number for Windows 10. (1897)
 8 Switch on the Magic Q PC wing. The switch is at the back of the console. Some blue indicator lamps will flash as it starts up
 9 Check the DMX Multi Exchanger unit is on. It is located in the rack in the metal cabinet. (This converts the DMX signals from the PC wing to the DC voltage signals required by the dimmer packs to power the legacy lights.)
Sound
 10. Switch on the Sound PC located in the metal rack under the left hand end of the desk.
 11. Switch on the sound computer screen. The sound computer starts without needing a password and a screen with various icons is displayed.
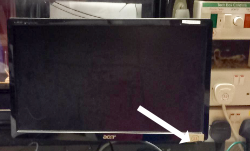
 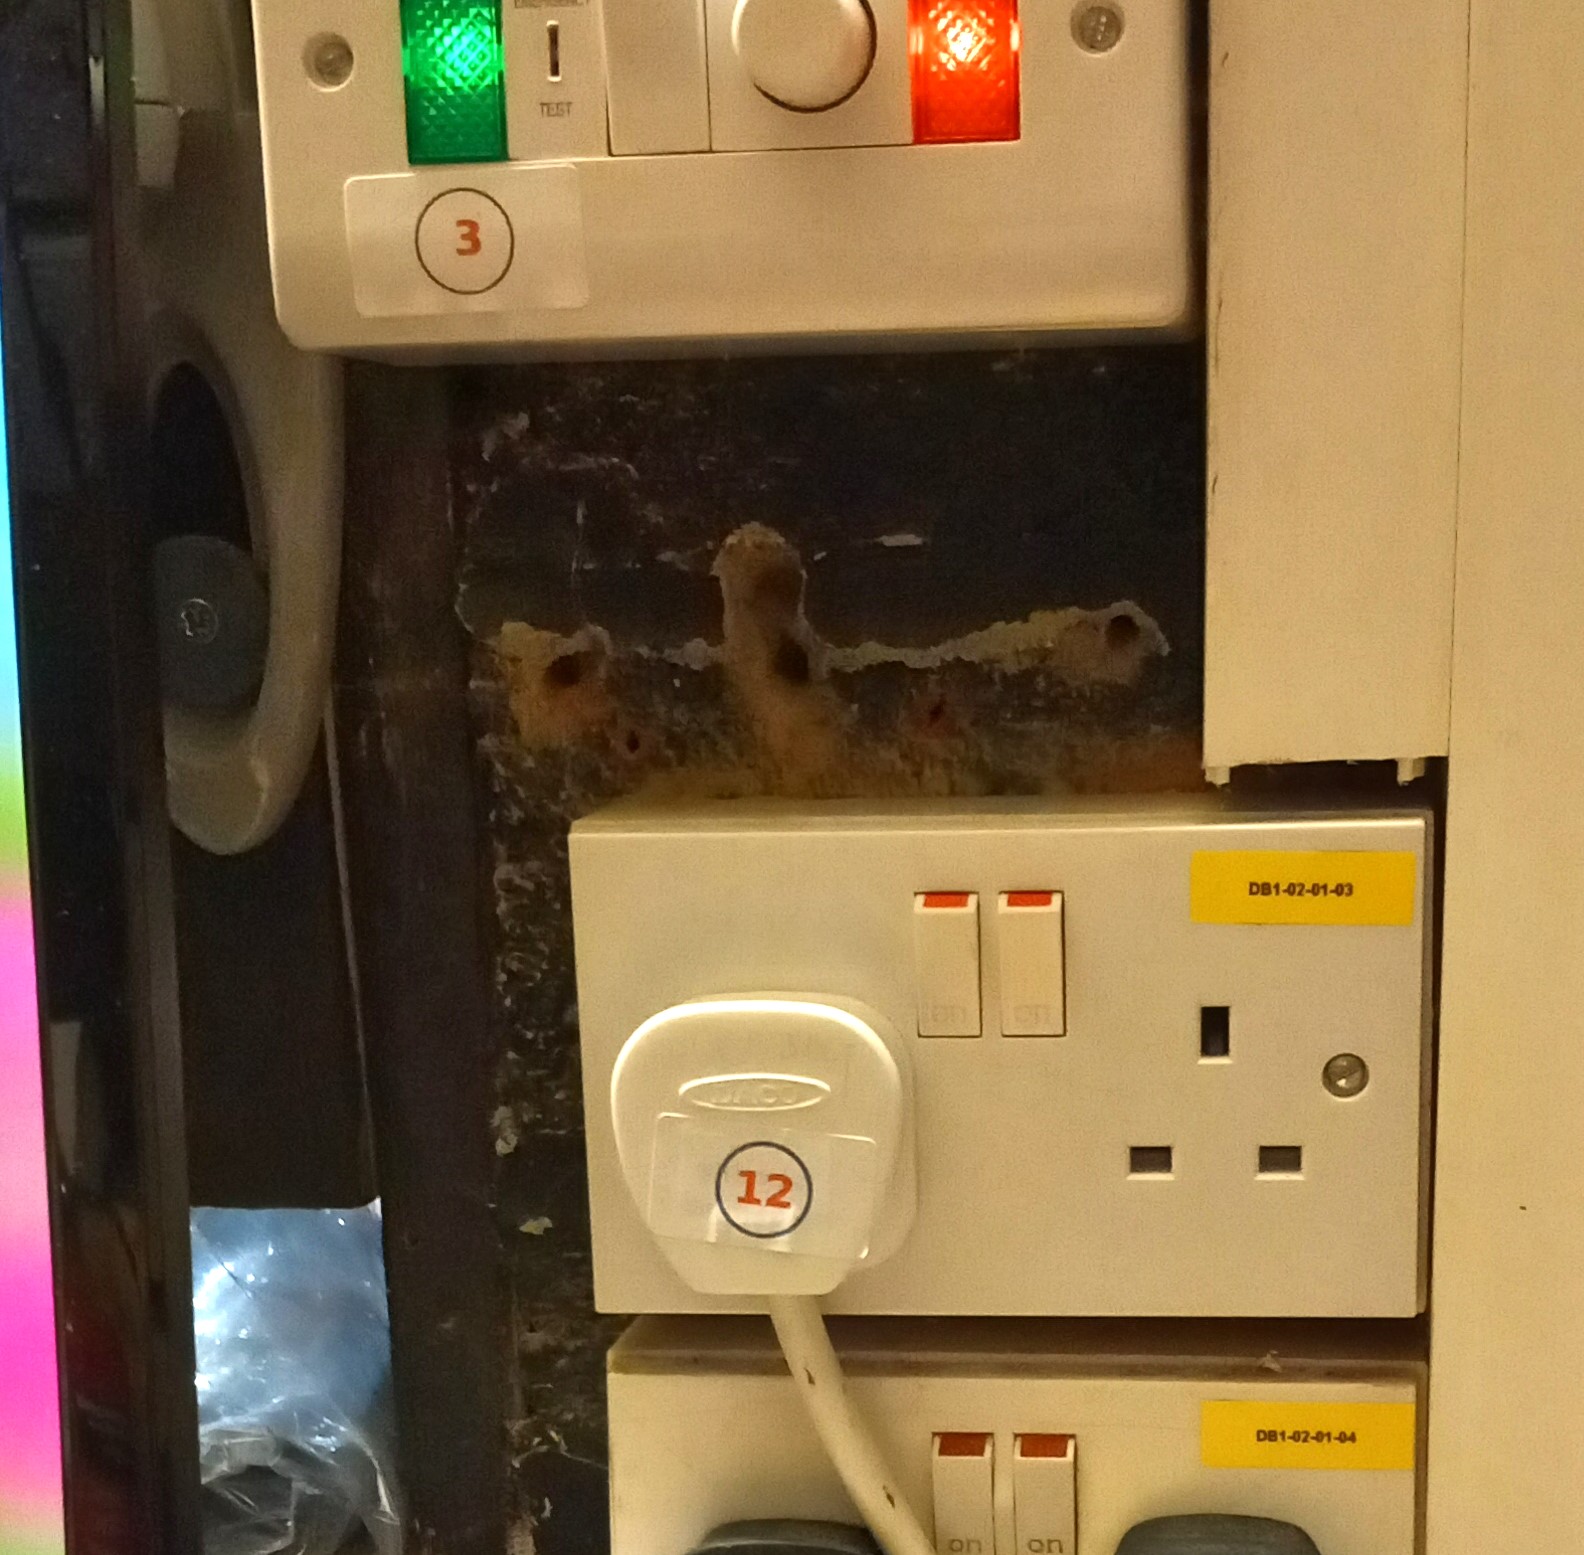 12. If you intend to use the projector, switch on the power for it using the 13 Amp plug marked "12". This is usually plugged into the the socket under the block of switches including the dimmer control (step 3 on this page) An amber light visible at the back of the projector indicates that the projector is in standby mode.
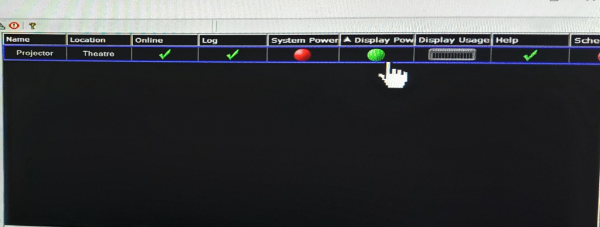
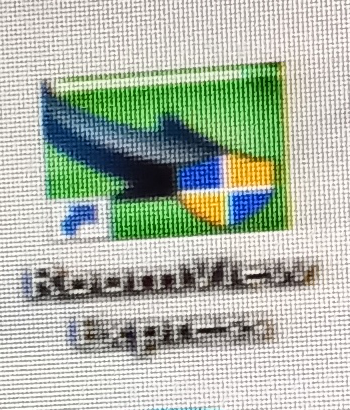 13. To switch on the projector, click the Room View Express icon on the sound computer
screen (User = admin – no password required).
13. To switch on the projector, click the Room View Express icon on the sound computer
screen (User = admin – no password required).
You will get warning messages about upgrades etc. - just accept them and continue.
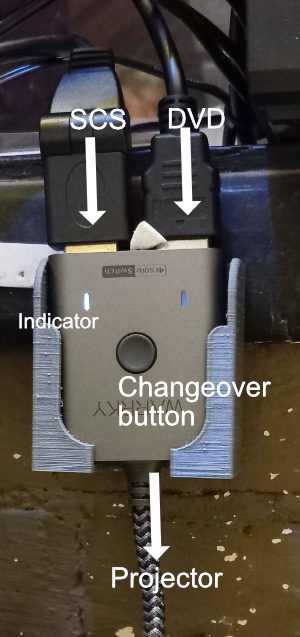 When the software has started and is showing the row of buttons, click the Display Power button. It will turn green as will the indicator light on the projector itself. If you intend to use the projector controlled by SCS (whether or not you also intend to use the DVD), it must be started before SCS (next step) and the HDMI switch must be set to connect the projector to SCS rather than the DVD player. If you do not do this, SCS will fail to recognise the projector and won't be able to control it. If you make this mistake, turn off SCS, make sure the projector has power and the switch is in the correct position and start SCS again.
You can also start the projector with its remote control - i.e. ignoring RoomView Express - but you will need to be in front of the projector to do so.
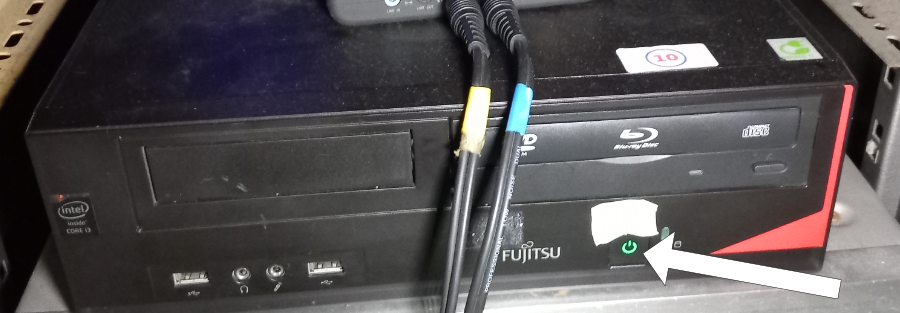
![]() 14. If a show has already been programmed and saved, there will be am appropriately named folder which should be clicked to start SCS. Otherwise, start the SCS software from its on screen logo.
14. If a show has already been programmed and saved, there will be am appropriately named folder which should be clicked to start SCS. Otherwise, start the SCS software from its on screen logo.
The lighting and sound systems will now be working.
Powering down is the reverse of this procedure but if you have used the projector, skip steps 12 and 2 for at least 5 minutes. This keeps the projector fan running to cool the lamp down.
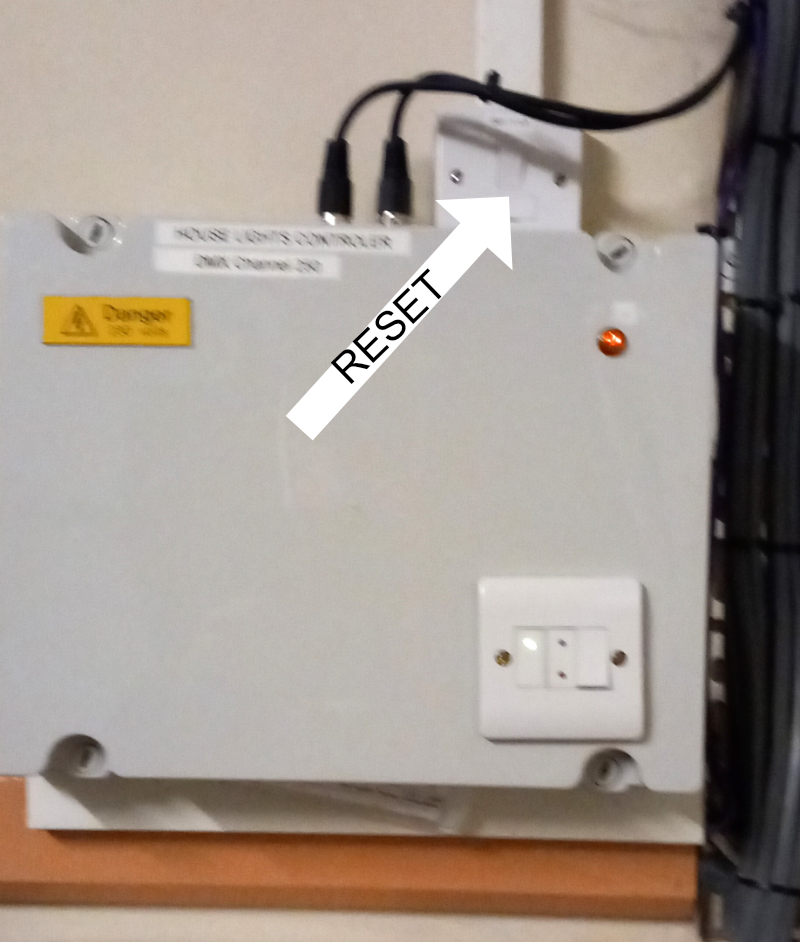
Also check the house lights have gone back to local control. i.e. you can control them with the house lights On/Off switch next to the red switchover switch. If not, switch off the power for the House Light controller for a few seconds. This is on the wall opposite the bottom of the lighting box ladder.