
Magic Q Basic Concepts
The lighting computer runs Chamsys' Magic Q software. The software is extensive so it takes some time to become comfortable with it, however there is a free comprehensive manual and many online tutorials - just search the internet for "Magic Q".
The software can also be downloaded free and so provides a good starting point for learning.
Magic Q includes a visualiser showing what would happen if the lights were connected to the computer. This allows shows to be planned and tested on a home machine without visiting the lighting box. The show can then be copied onto a memory stick and loaded into the lighting computer.
Viewed at its simplest, the steps to getting MQ to control any lighting are:Patch the heads (MQ uses the word 'head' for lights).
Patching means telling MQ the 'personality' and DMX address of every light. Patching is only needed for lights that have not been used with this computer before, so this step can usually be skipped.-
Set up the cues for the show.
MQ uses the word 'cue' to mean a combination of lights at various intensities and possibly movements or chases with or without fade timings. An example of programing a simple cue of four lights is shown in the screen shot below.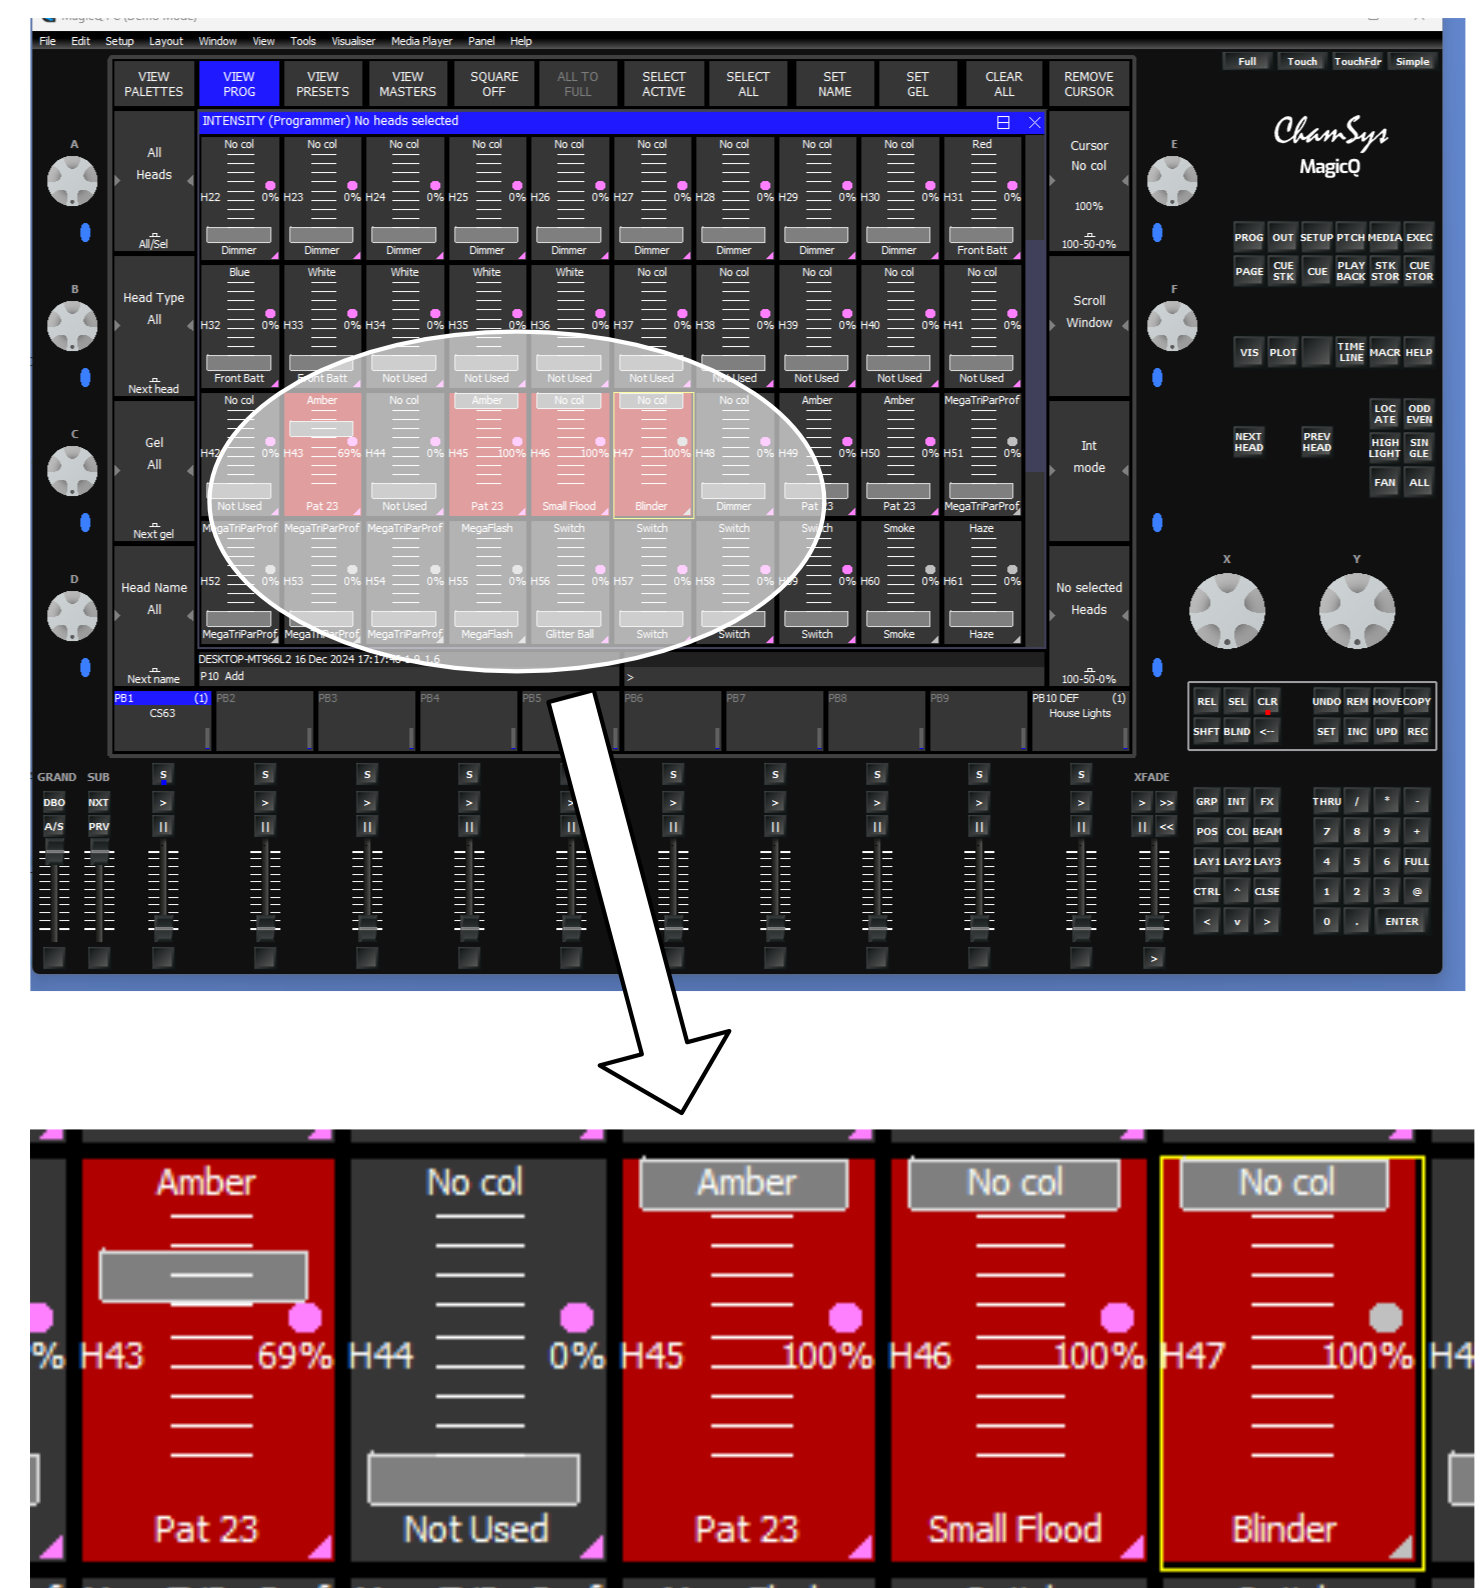
Here head 43 is set to 69% brightness. We can see that it is a light type called Pattern 23 and wll produce amber light. H45 is the same type of light but set to 100%. H46 and H47 are a Small Flood and a Blinder, both set to no colour (i.e. white) at full brightness.
- Store the cues.
Cues are automatically placed in the cue store with a unique number but they can also be given a name. There is room for hundreds of cues.
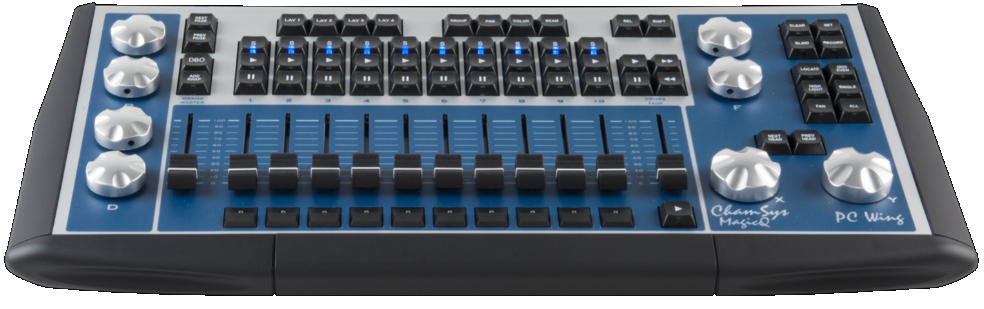
Cues can be copied into playback faders (see below). In our case there are only 10 of these
Cues can added to existing cues and the result is then held in the cue stack store. Cue stacks can be moved to playback faders too. Play the cues.
Cues can be played from any of their locations but most commonly they are played from a playback fader. The playbacks can be on screen (everything in MQ can be done on screen) or on the physical playbacks of the PC wing. The image below shows cue stack 77 named 'Act II', and the current cue, 'cue id 1 Warmers', highlighted in blue. The word 'Complete' here means the cue is completely loaded after any fade up times have completed).
Along with a lot of other information about the cue, we can see that the cue is stored by itself as Q150 Warmers. Raising or lowering the fader will increase or decrease the intensity of the lights. Clicking the > button at the bottom of the x-fader will progress the lighting to the next cue, which we can see will stop music with a 5 second fade. (In this particular show the sound computer was receiving instructions from the lighting computer)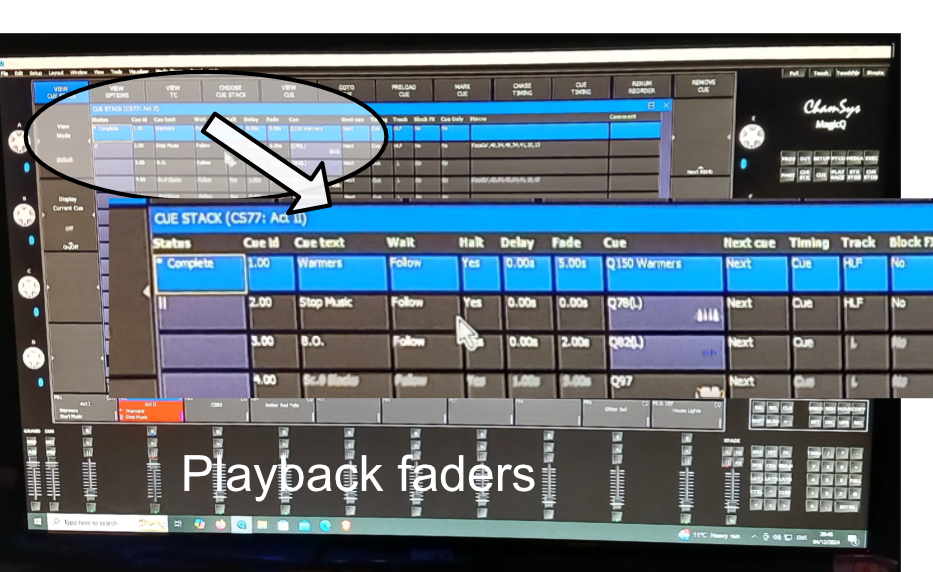
In a well rehearsed play it is normal to use this 'click for next cue' approach but it becomes impossible when lighting an outside production where we have limited knowledge of what is needed. Instead likely cues such as 'Stage left', 'Stage centre', 'Stage right', 'Red back wall' are set up and put on individual playbacks and the show is 'busked' by the lighting operator manually selecting the cues as the action proceeds on stage.
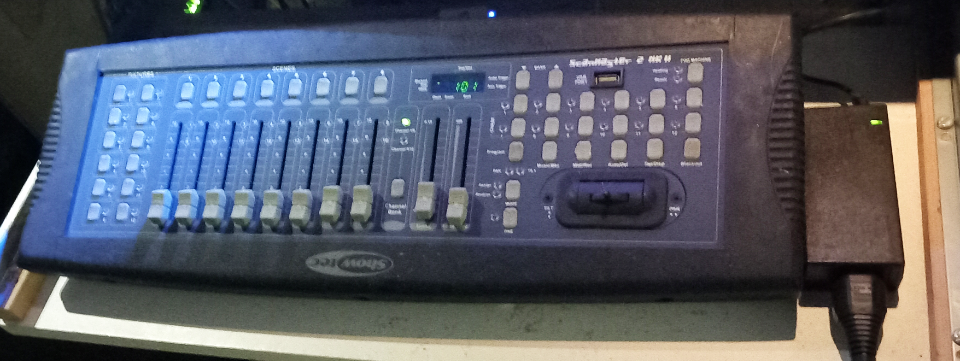
Sometimes the 10 playbacks on the PC wing are too limiting for easy busking so we have devised a method of providing an additional 8 playback faders from a Showtech Scanmaster console. This connects to MQ through wifi and controls whatever has been put in cue stacks CS101 to CS108. The unit is on the sliding shelf under the right hand end of the desk.
The showtech add-on,guide is inthis PDF file> and full technical details are in this PDF file.